DIY Crinoline Flower
Posted by Aine on 8th Jul 2016

Ladies Day at the Galway Races is coming up! It is a great chance to see some amazing millinery pieces on show for the Best Hat Competition. DIY millinery has become more and more popular recently, especially for weddings.
Here is a quick tutorial on how to make crinoline flowers for your hat pieces.
You will need:
1 metre of crinoline in your chosen colour
Matching thread
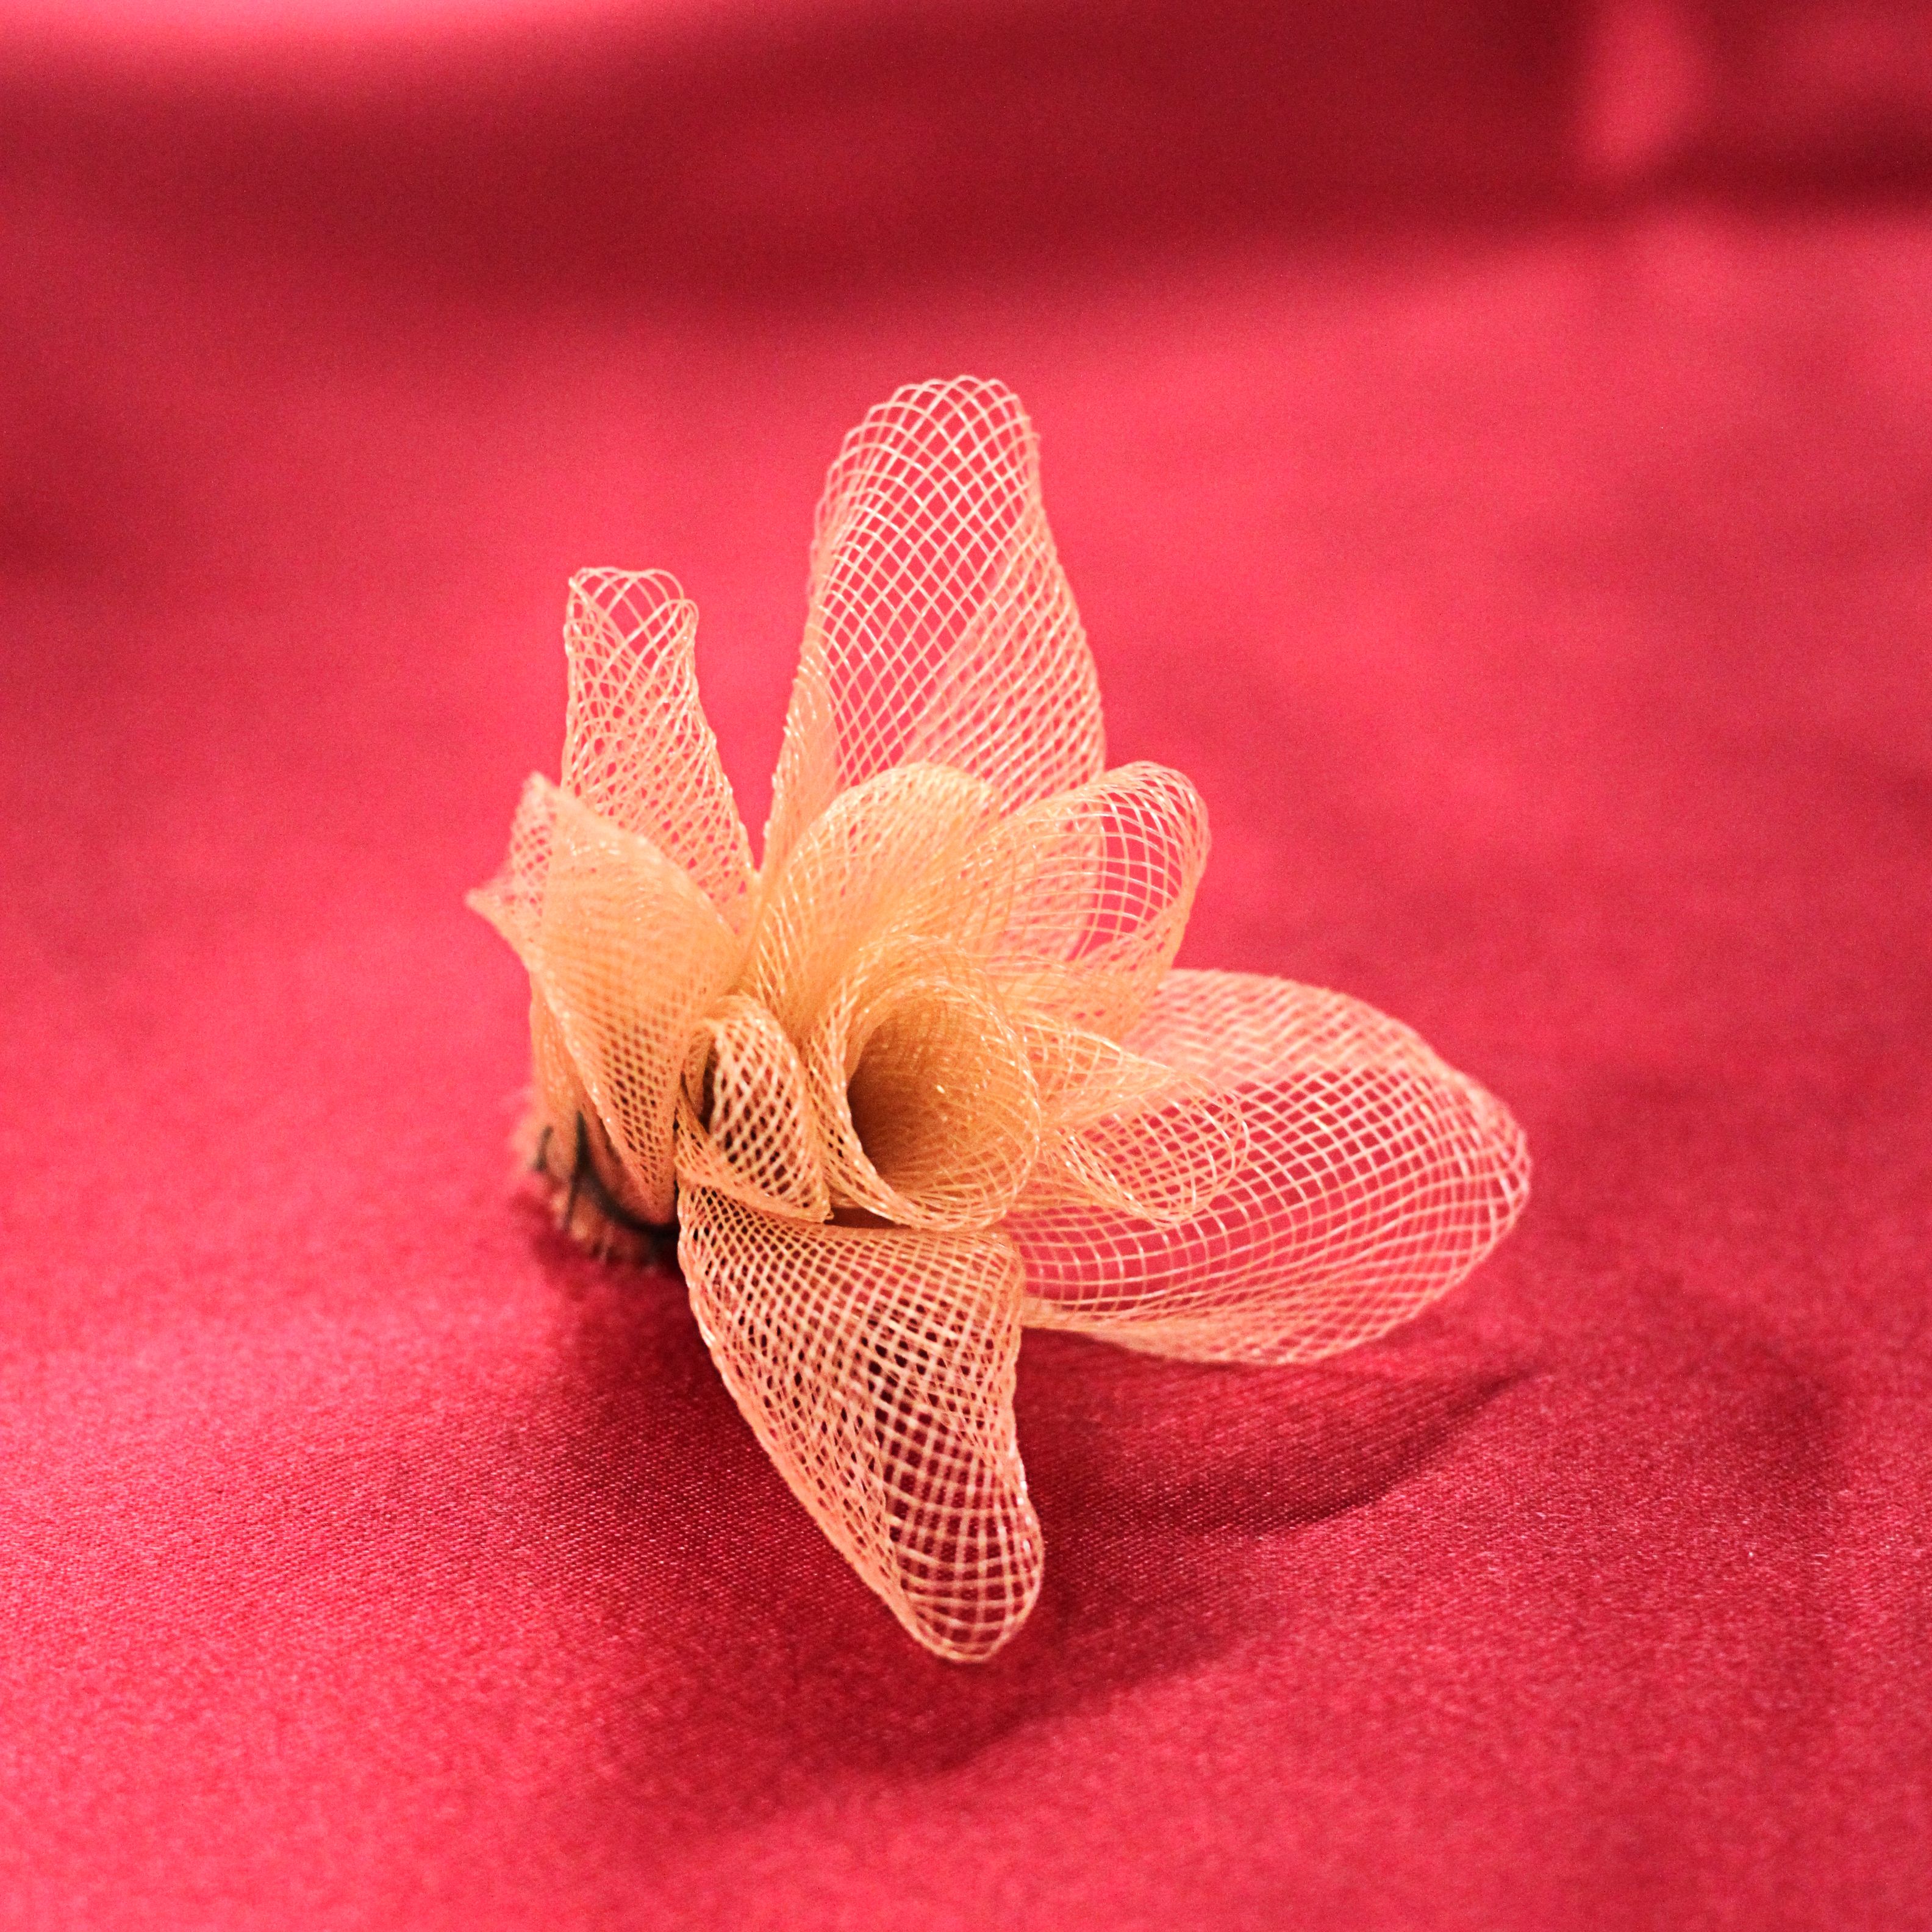
First you will need to make the centre of the flower. Do this by twisting and gathering your crinoline into a rose bud shape, as shown. Hold tightly and stitch through the base of the flower. Do this a number of times to secure it, this is important as crinoline can unravel easily.

Next, trim off the excess crinoline. You can decide to use your flower like this and make a number of crinoline rose buds to decorate your fascinator. You can also build on your flower to make it a larger centre piece. To make crinoline petals you will need to fold your crinoline into triangles and stitch them in place onto the centre of the flower.
You can choose to add as many petals as you wish, making them larger as you add more. Your crinoline flower is now ready to be added to your fascinator or head piece!