


How to Make a Fascinator Part 3
Posted by Lia on 18th Mar 2017
This week I finished my fasinator. I included some of our patterned clearance sinamay to give it some extra colour and detail. I think it really adds to the fasinator.
I molded this patterned sinamay around the original shape of my fascinator. Again I had to wet and iron the sinamay in order to get the shape I wanted. I then secured this by stitching it in place, making sure to use a matching thread so the stitches would be hidden.
For the detail at the front of my fascinator I made a sinamay bias binding using the same technique as before. I made a 10mm bias strip, steamed it over the kettle and curled it into the shape you see below. I then stitched it in place on the hat.
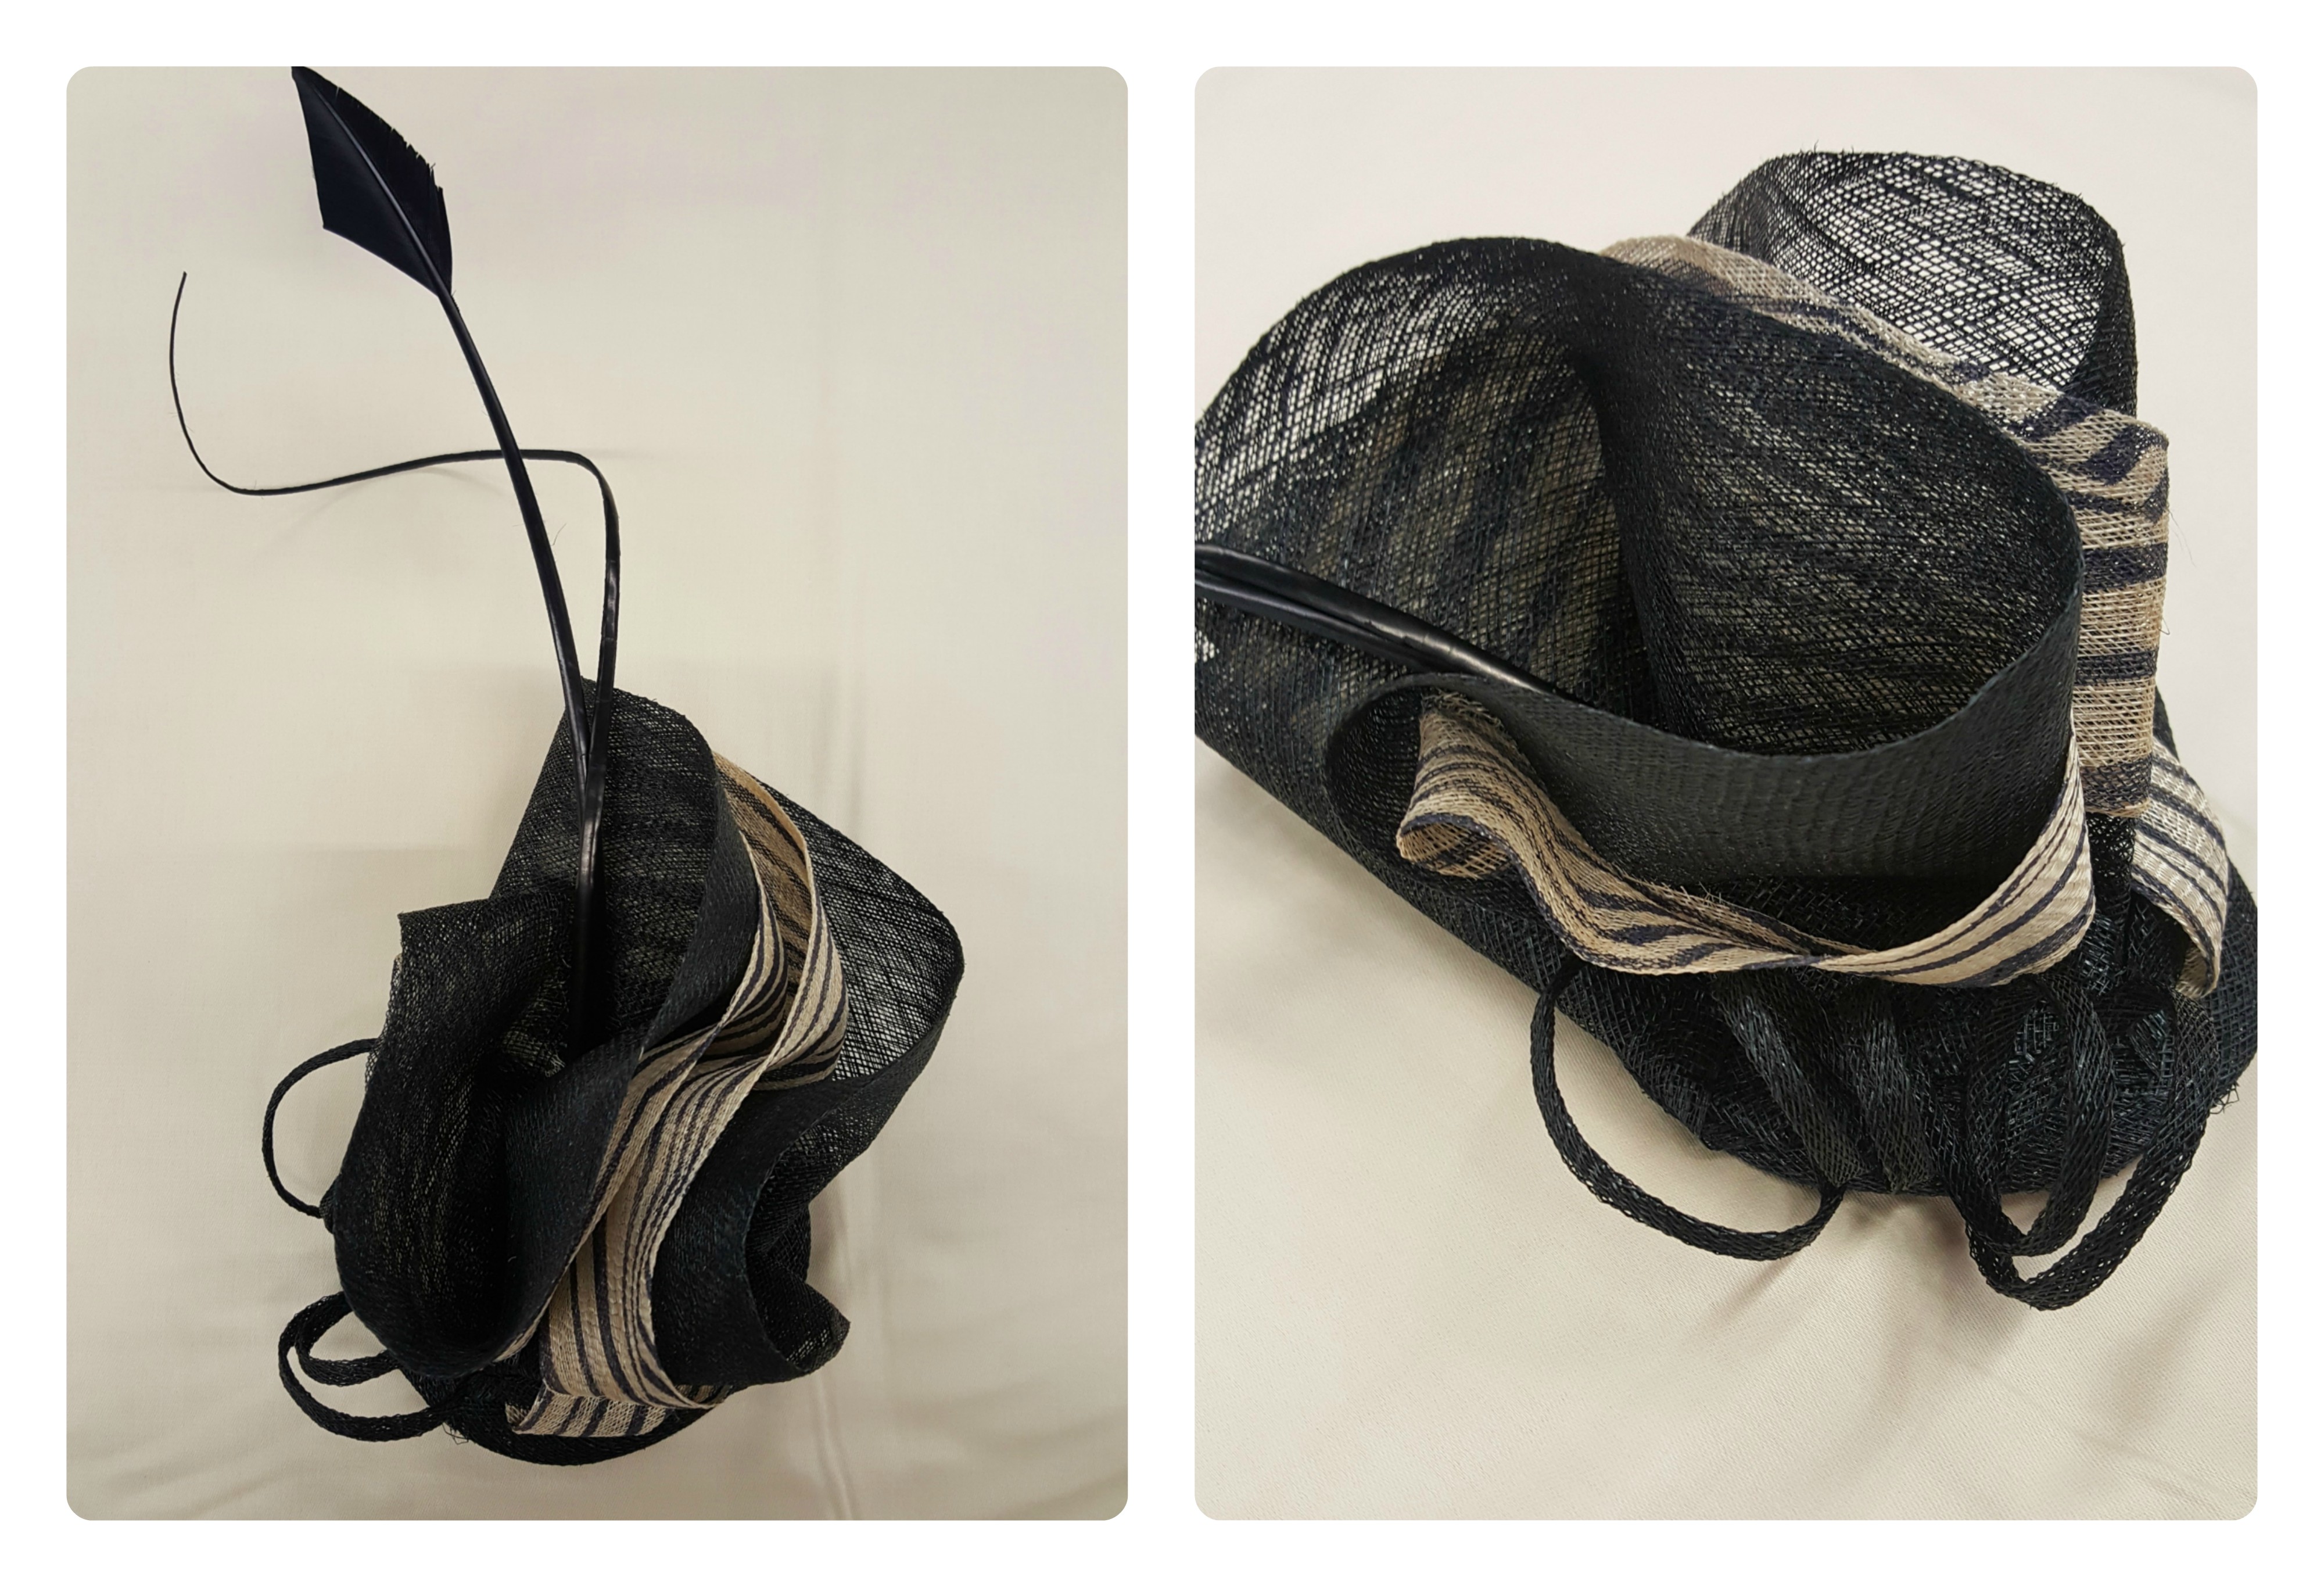
Next, I added an arrowhead quill feather and a stripped spadona quill as a finishing touch. I steamed the stripped spadona quill so that I could twist and curl it. You can also use a curling tongs to achieve an even tighter curl in your quill feather. Both of these feathers are easily stitched in to place. If you make one of your stitches through the centre of the base of the feather it will secure it in place much better.
The last piece I added was some hat elastic to the base of the hat, this will keep it in place on your head. Alternatively you could attach clips, combs or a hairband, whichever you find most comfortable to wear.
And this is the finished fascinator!

I hope these blog posts were helpful for you and give you some inspiration for your own millinery designs. Everything I used to make my hat can be found both in-store and on our online shop.